If I had 1 ether for every procedurally generated, pixellated image that I had seen over the past 12 months, I think I’d have enough for half a bored ape.
In this tutorial, we’ll create our own procedurally generated pixel pieces. Before we get there, we’ll need to understand exactly what an image is to a computer and how we can modify them. What we cover should lay the foundations for you to create your own randomly generated images, create an NFT collection and become a crypto millionaire overnight.
We’ll start with a photo and understand what it is behind the image, before editing it manually. Then we’ll start from scratch with a new canvas and create pixel art football players with random kit colours.
The full notebook and assets for this article can be found here.
Loading an image and looking under the hood
First things first, let’s import our packages.
import numpy as np
from PIL import Image
import random
import matplotlib.pyplot as plt
The PIL library allows us to easily load, save and edit images. We can easily load an image in the same folder as our code with Image.open, then display it with matplotlib’s imshow function.
image = Image.open('img.jpeg')
plt.imshow(image)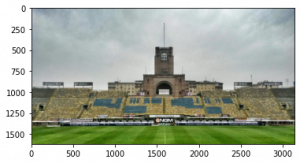
As you probably know, matplotlib is a data viz library. So how is it able to show photos?! All an image is is a spreadsheet of numbers. Think of each pixel as a single cell, each one containing the information as to what colour it should show. Let’s have a look at the data of this image – what shape is it and what is an example of a cell?
#Convert image to an array and check out the shape
imageArray = np.asarray(image)
imageArray.shape
#(1618, 3143, 3)
The size has three numbers, so it is a 3d array. Think of it like a spreadsheet again, with each cell having multiple numbers. These lists of multiple numbers within a table mean that it is 3d. What does the very first cell look like?
#View the first cell in the first array
#It is a list of 3 values - an RGB colour!
imageArray[0,0]
#array([119, 131, 145], dtype=uint8)
The cell is an array of three values. The three values represent the colour of the pixel in the image with an RGB value. RGB is the mix of red, green and blue of a colour, with each going from 0 (none of that colour) to 255 (loads of that colour). Check out Google’s colour picker to see how RGB values create any colour.
Now that we can see that the image is simply made up of arrays and lists, this is just data like anything else we analyse. We can select specific parts of the array and display them by slicing the array in square brackets:
#Plot a subsection of the array
#This selection is everything on the y axis, but a selection of the x axis
plt.imshow(imageArray[:,1150:2000,])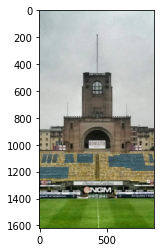
Or we can even change the numbers in the array and subsequently change the picture:
#Create a copy of the image
#Change the subsection of the array to [0,0,0] - black in RGB
imageArrayCopy = imageArray.copy()
imageArrayCopy[:,1150:2000] = [0,0,0]
plt.imshow(imageArrayCopy)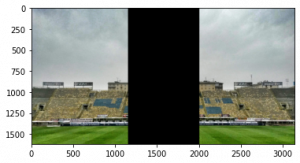
There are millions of other things that you can do with image data. Editing and analysing these numbers are how Snapchat filters are made, are the bones of computer vision, and so much more. But we’ll be doing something a lot less impressive… creating pixel art 😎
Creating our own images
We have seen an image array created from a photo, but we can just as easily create our own. Let’s use numpy to create one with all zeros. 0, 0, 0 is black in RGB, an absence of colour, so we would expect a black image…
#Create a new 3d array, filled with zeros
#The image is only 40 pixels y, 23 pixels x
playerImage = np.zeros((40,23,3), dtype=np.uint8)
plt.imshow(playerImage)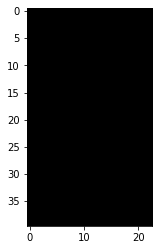
Just like before, we can change pixel values by changing values within this array:
#Set a background colour and overwrite all values in the 3d array
bg = [60,179,113]

for i in range(0,40):
    for j in range(0,23):
        playerImage[i,j] = bg

plt.imshow(playerImage)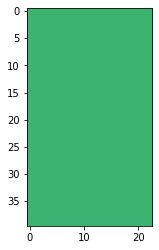
Our image is much, much smaller than the first photo, so changes to individual pixels are much more prominent. This gives us a canvas for basic pixel art. A simple rectangle gives us the outline for a shirt:
#Plot the silhouette for a shirt

for i in range(14,25):
        for j in range(4,19):
            playerImage[i,j] = [215,80,80]
… which obviously needs arms to be cut out …
#Plot the arm and shoulder gaps with the background colour

#Arm gaps
for i in range(19,25):
    playerImage[i][6] = bg

for i in range(19,25):
    playerImage[i][16] = bg


#Shoulder gaps

shoulders = [[14,4],[14,5],[14,6],
        [15,4],[15,5],
        [16,4],
        [14,16],[14,17],[14,18],
        [15,17],[15,18],
        [16,18]]

for each in shoulders:
    playerImage[each[0],[each[1]]] = bg

plt.imshow(playerImage)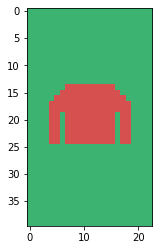
…same for the shorts…
#Create the silhouette and gaps for the shorts

for i in range(24,30):
        for j in range(7,16):
            playerImage[i,j] = [230,230,0]

for i in range(28,30):
    for j in range(10,13):
        playerImage[i][j] = bg

plt.imshow(playerImage)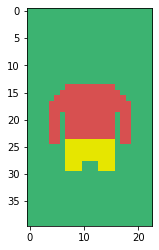
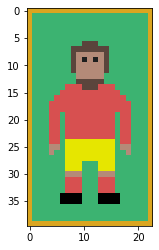
The rest of the code to generate this figure is in the notebook, but we can quickly create the simple figure below.
Creating generative versions of these is now easy with a series of if statements and random numbers. The most obvious example would be changing kit colours. Random colours are fun and simple. Remember how colours are just three numbers? A function that returns a random number between 0 and 255 three times would subsequently be a random colour generator:
#Returns random colour
def randomColour():
    return list(np.random.choice(range(256), size=3))
And if we wrap our image creation code in a function (as shown in the notebook) and use the colour generator as arguments for the kit, you have randomly generated players!
#Create player with random colour for shirt and shorts
#See notebook for function code!
#3 parameters are background colour, shirt colour, shorts colour
createPlayer([60,179,113],randomColour(),randomColour())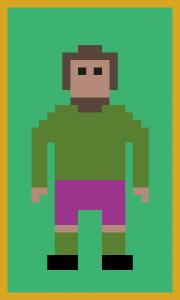
This is clearly very basic, but now we are just limited by the customisations that we can think of and assign to the pixels. We can easily use random choices to pick different kit designs, hair, boot colours, sleeve length, tattoos, and so on. Here are 1,000 examples with a few more random choices added to our creation logic:
In this piece we have looked to understand that all an image is is a 3d array of RGB values. As such, we can use our array slicing and editing skills to make changes to images or even create new ones. By combining this with some design and random number generation, we have been able to create procedurally generated pixel art images. These concepts serve as super basic introductions to parts of image manipulation, computer vision, generative art and loads more fields, each of which has a huge body of work on Twitter and elsewhere. Hopefully we’ve sparked some interest to learn more, so get in touch if you’d like some recommendations!
Show us what you can create with these ideas on @FC_Python! Looking forward to seeing what you come up with.